Last Man Standing, Gabriel costume
Back in 2013 my girlfriend introduced me to the art of a really talented guy named Dan LuVisi and the work he was doing on Last Man Standing. We thought his character concepts were very cool and she wanted to make a costume based on one of his designs, Alice. She reached out to him to ask permission and he was very supportive of it all, so thanks again Dan! And with that we set out to create this huge mess of a project that somehow came together. Since she had already decided which character she would do I had to pick my own. There were several characters that I thought would be fun to build, but no one had made Gabe yet and I figured I might as well start there.
This design was based off of Dan LuVisi's character, Gabriel. The overall design I based most of my work off of was done by Dan and Darnell Isom at Legacy Effects.
This was never meant to be a step by step or tutorial on how I built it so I apologize if it jumps around. These images are just a small collection I gathered sparsely over the course of the build. Even as a 3D artist I've always been fascinated with traditional effects and prop building, and through this project I got to learn many things that cross over from one medium to another. I also learned the frustration that goes into having to essentially build an entire asset twice. That said if you have any questions feel free to ask.
This was a lot of fun to build and I hope to do more in the future. Thanks again to Dan LuVisi and his friends for their support.
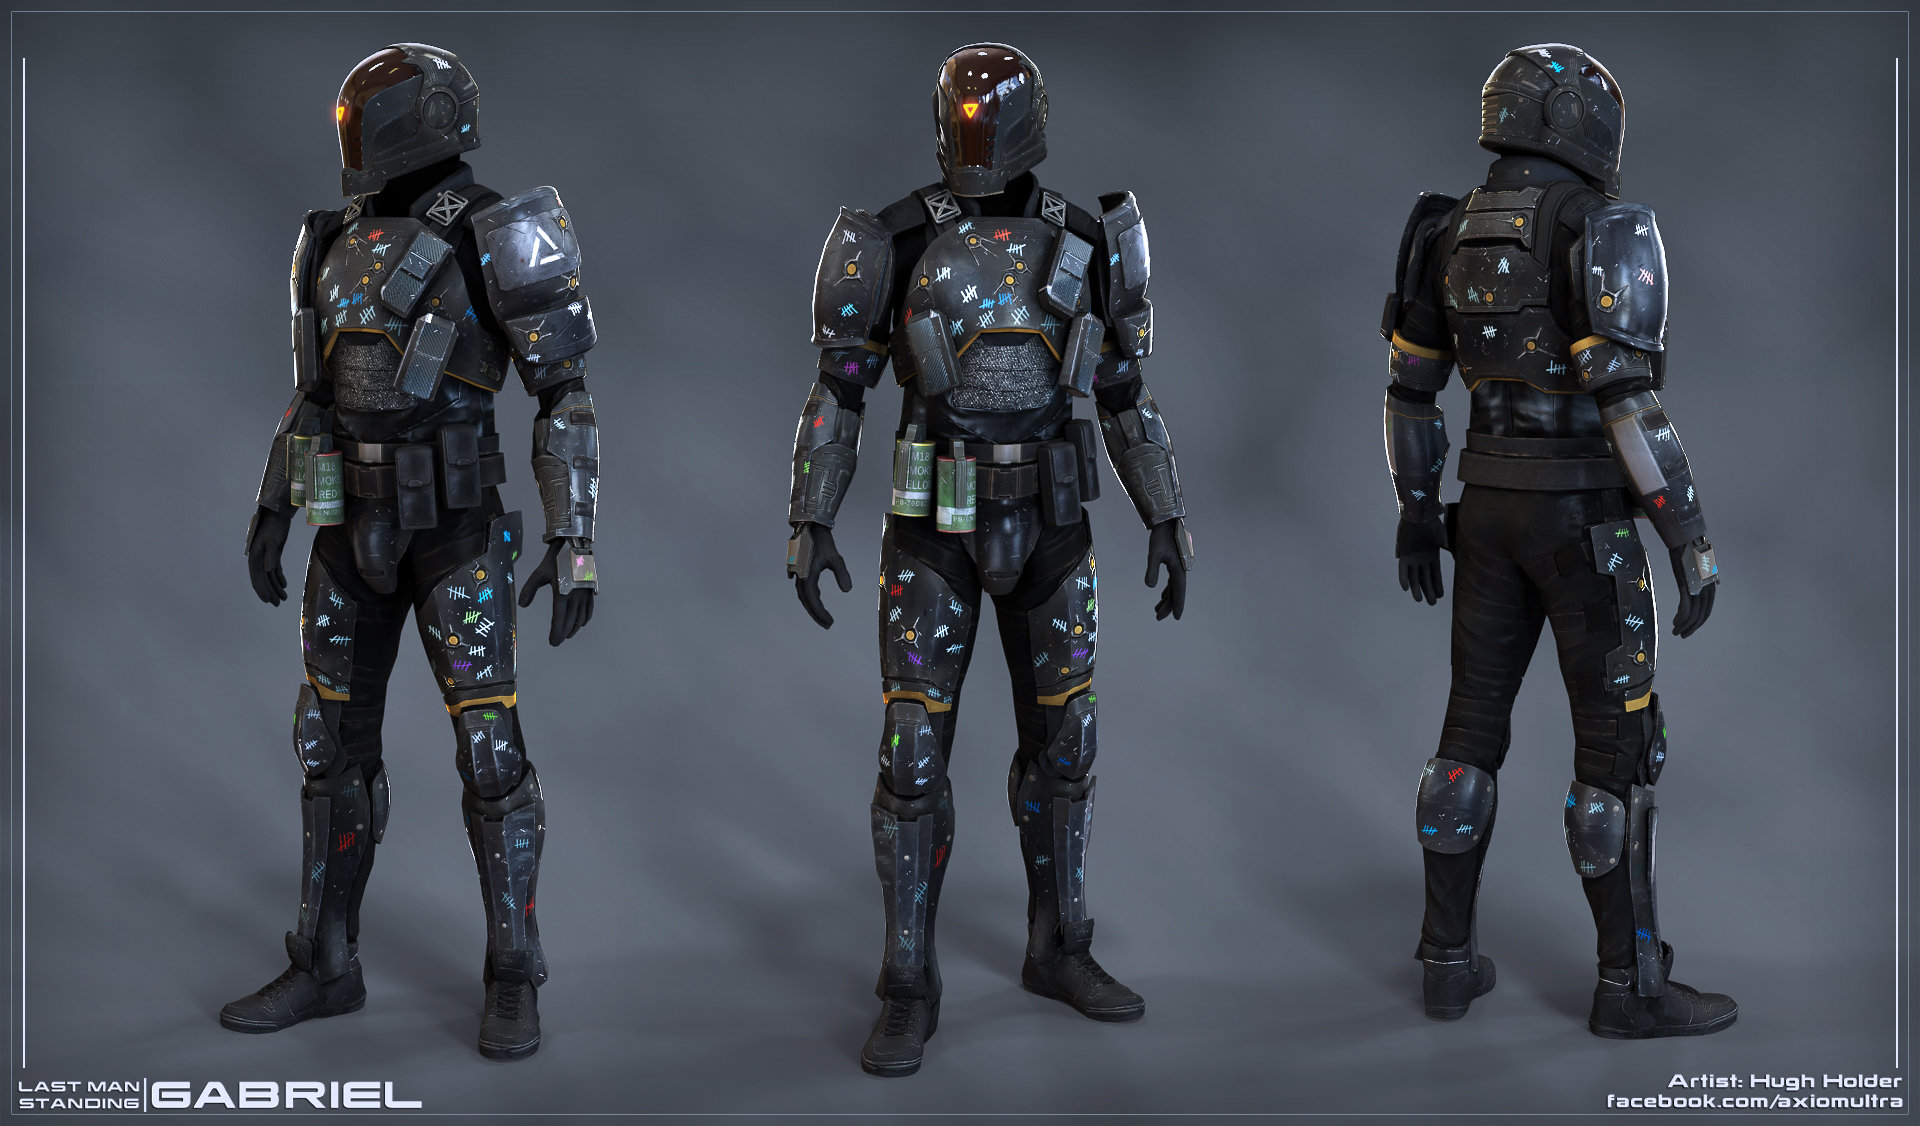
Final turnaround for my 3D model.
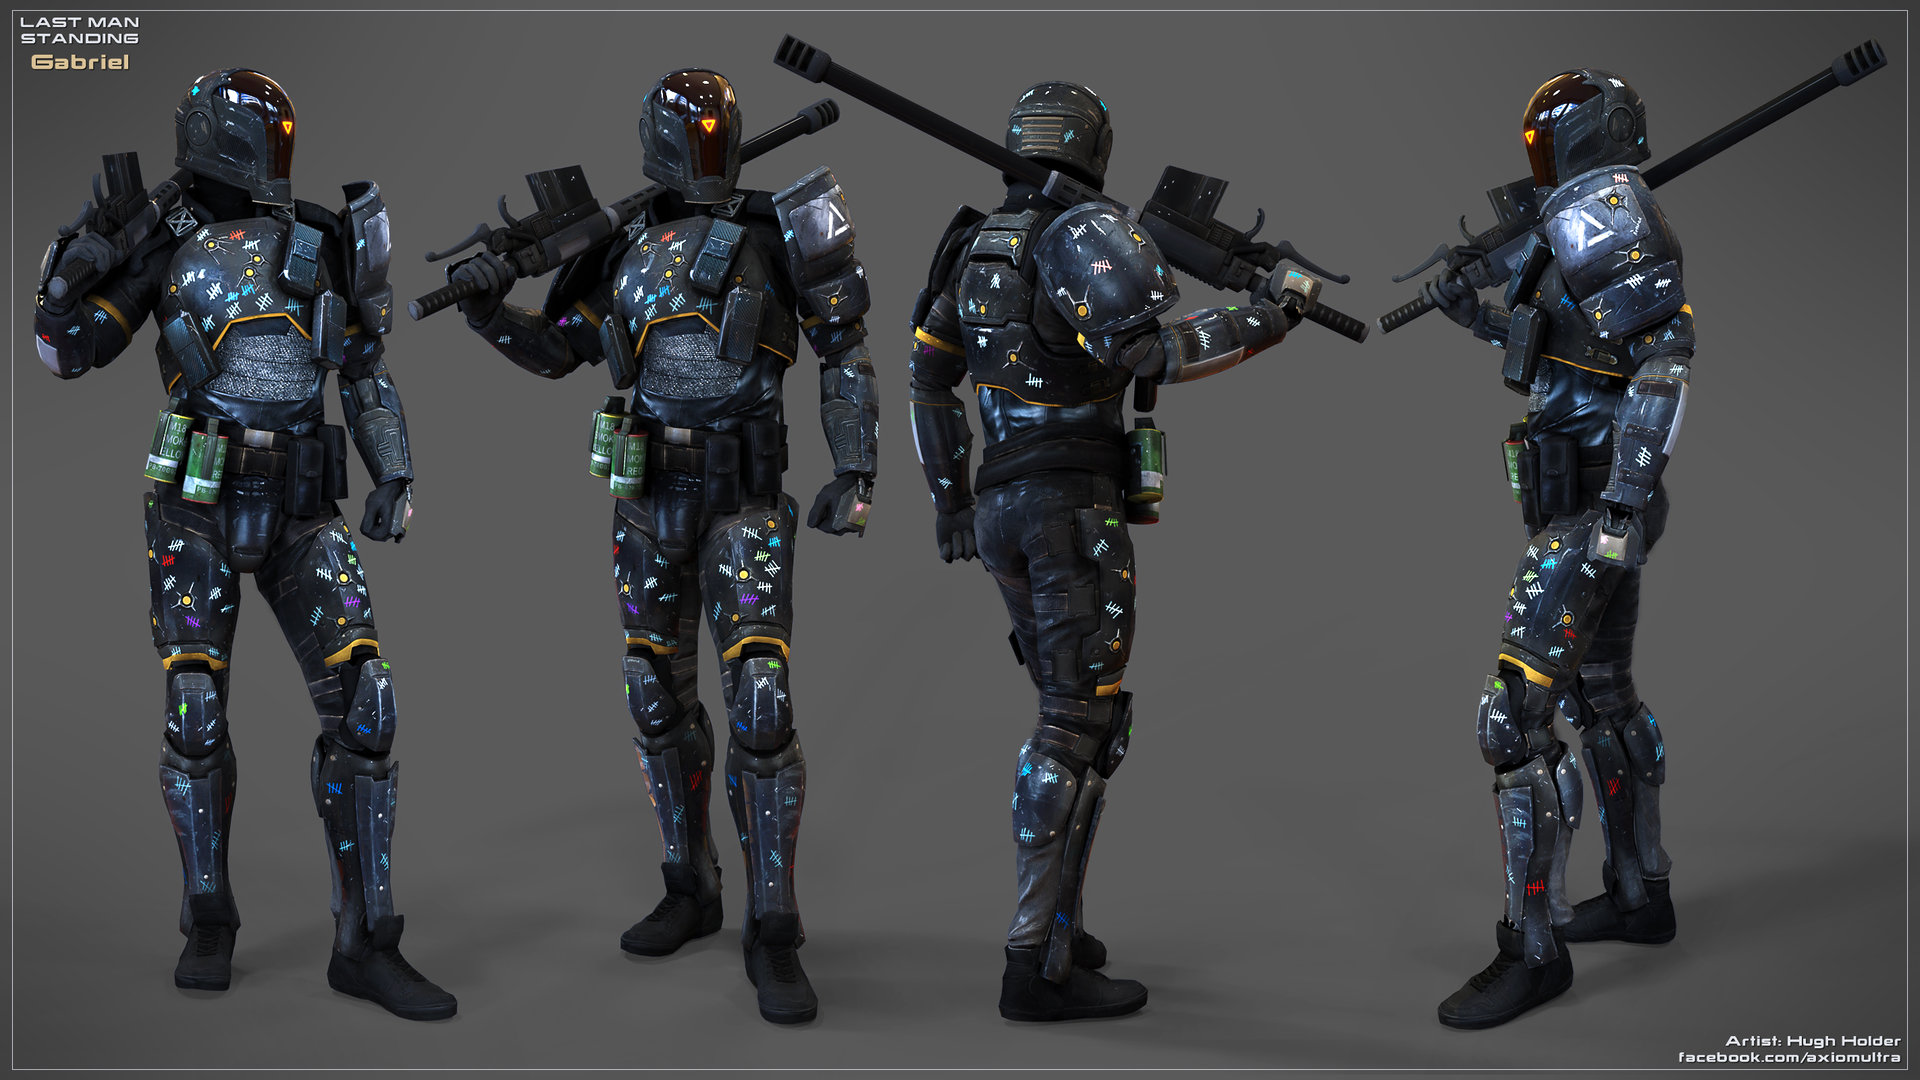
Final turnaround for my 3D model.

Early concept sketch exploring different elements of the character. Later I realized there was too much going on around the trunk of the model and that his shoulders needed to be asymmetrical.

After several edits to the armor parts and proportions I locked down the overall design of the elements. It was time to export and finalize the scale.

People building costumes always tell you to never start with the helmet first but I couldn't help myself. I figured if I couldn't get this to look right there wasn't much of a point in finishing the rest of the outfit.

Gratuitous polygroups shot. Always good to plan ahead on how you want to break the asset down for building.

I created a properly scaled model of myself and my very non-super hero height/proportions. At this point it was time to separate the armor parts from my draft model and rescale them to my size.

Final proportions and silhouette turnaround. This would be my guide in the workshop to make sure everything was working together scale-wise. Scale is everything.

Separate helmet model and prepare for my 3d printer. Tedious work where you have to really think about the best way to lay out the parts and how much trouble you'll run into during the fabrication process.

Here are the first set of printed parts. The visor and two "cheek" areas. The visor is actually 3 parts printed and assembled using ABS glue, which works as a cement for the ABS plastic. The red is spot putty and sanded down using a decent 400 grit.

Primer and test fit. Exciting

More part test fit. Here I applied some tacky carbon fiber vinyl trim. I used the 3d model and a paper craft program (pepakura) to get stencils that allowed me to wrap the vinyl perfectly. Measure twice and cut once!

First half of the helmet assembled with the base coats. Using 3 different dark paints here. The visor was only temporary, I probably shouldn't have spent so much time working on it.

Not everything needed to be printed. To keep weight down and allow movement I made a lot of the large parts out of foam floor mats. Stencils for these were also made from the 3d model.

Draw clasps on the chest armor. Everything starting looking pretty good. This model is kind of dense and I don't honestly remember why. I think I was testing something out for my printer.

Here I finally had to face the issue of vacuum forming the visor. This was my attempt at designing a buck for the vac-former. I learned that it would be better to mill that buck out of wood next time as the plastic didn't hold up well to the heat.

Finished the "Twins" and forearms.

Finally pulling the visor. It was made from a clear PETG sheet and dyed a deep red to help the LED out, which somehow worked out just right. The light was a dome light for a car masked off with electrical tape. Hi-tech!

I needed a prop that wasn't two little guns. I decided to create a version based off one of Dan's illustrations in his Killbook of a Bounty Hunter.

The rest of the costume was built with the same process I've already showed you. Some parts were sourced like the gas cannisters from some airsoft props and the skittles which are actually skittles sealed in resin.

Test fit in my kitchen. I decided to opt out of using the pistols for the convention as they looked too small, and real. The gun baton suited the style of the character more to me.

Another test fit photo set for the costume.

Finally finished everything and got to the convention. A shot of Alice and I at DragonCon 2014 in Atlanta.

Got to meet some incredibly talented people there.

One more shot courtesy of Ed Martinez.
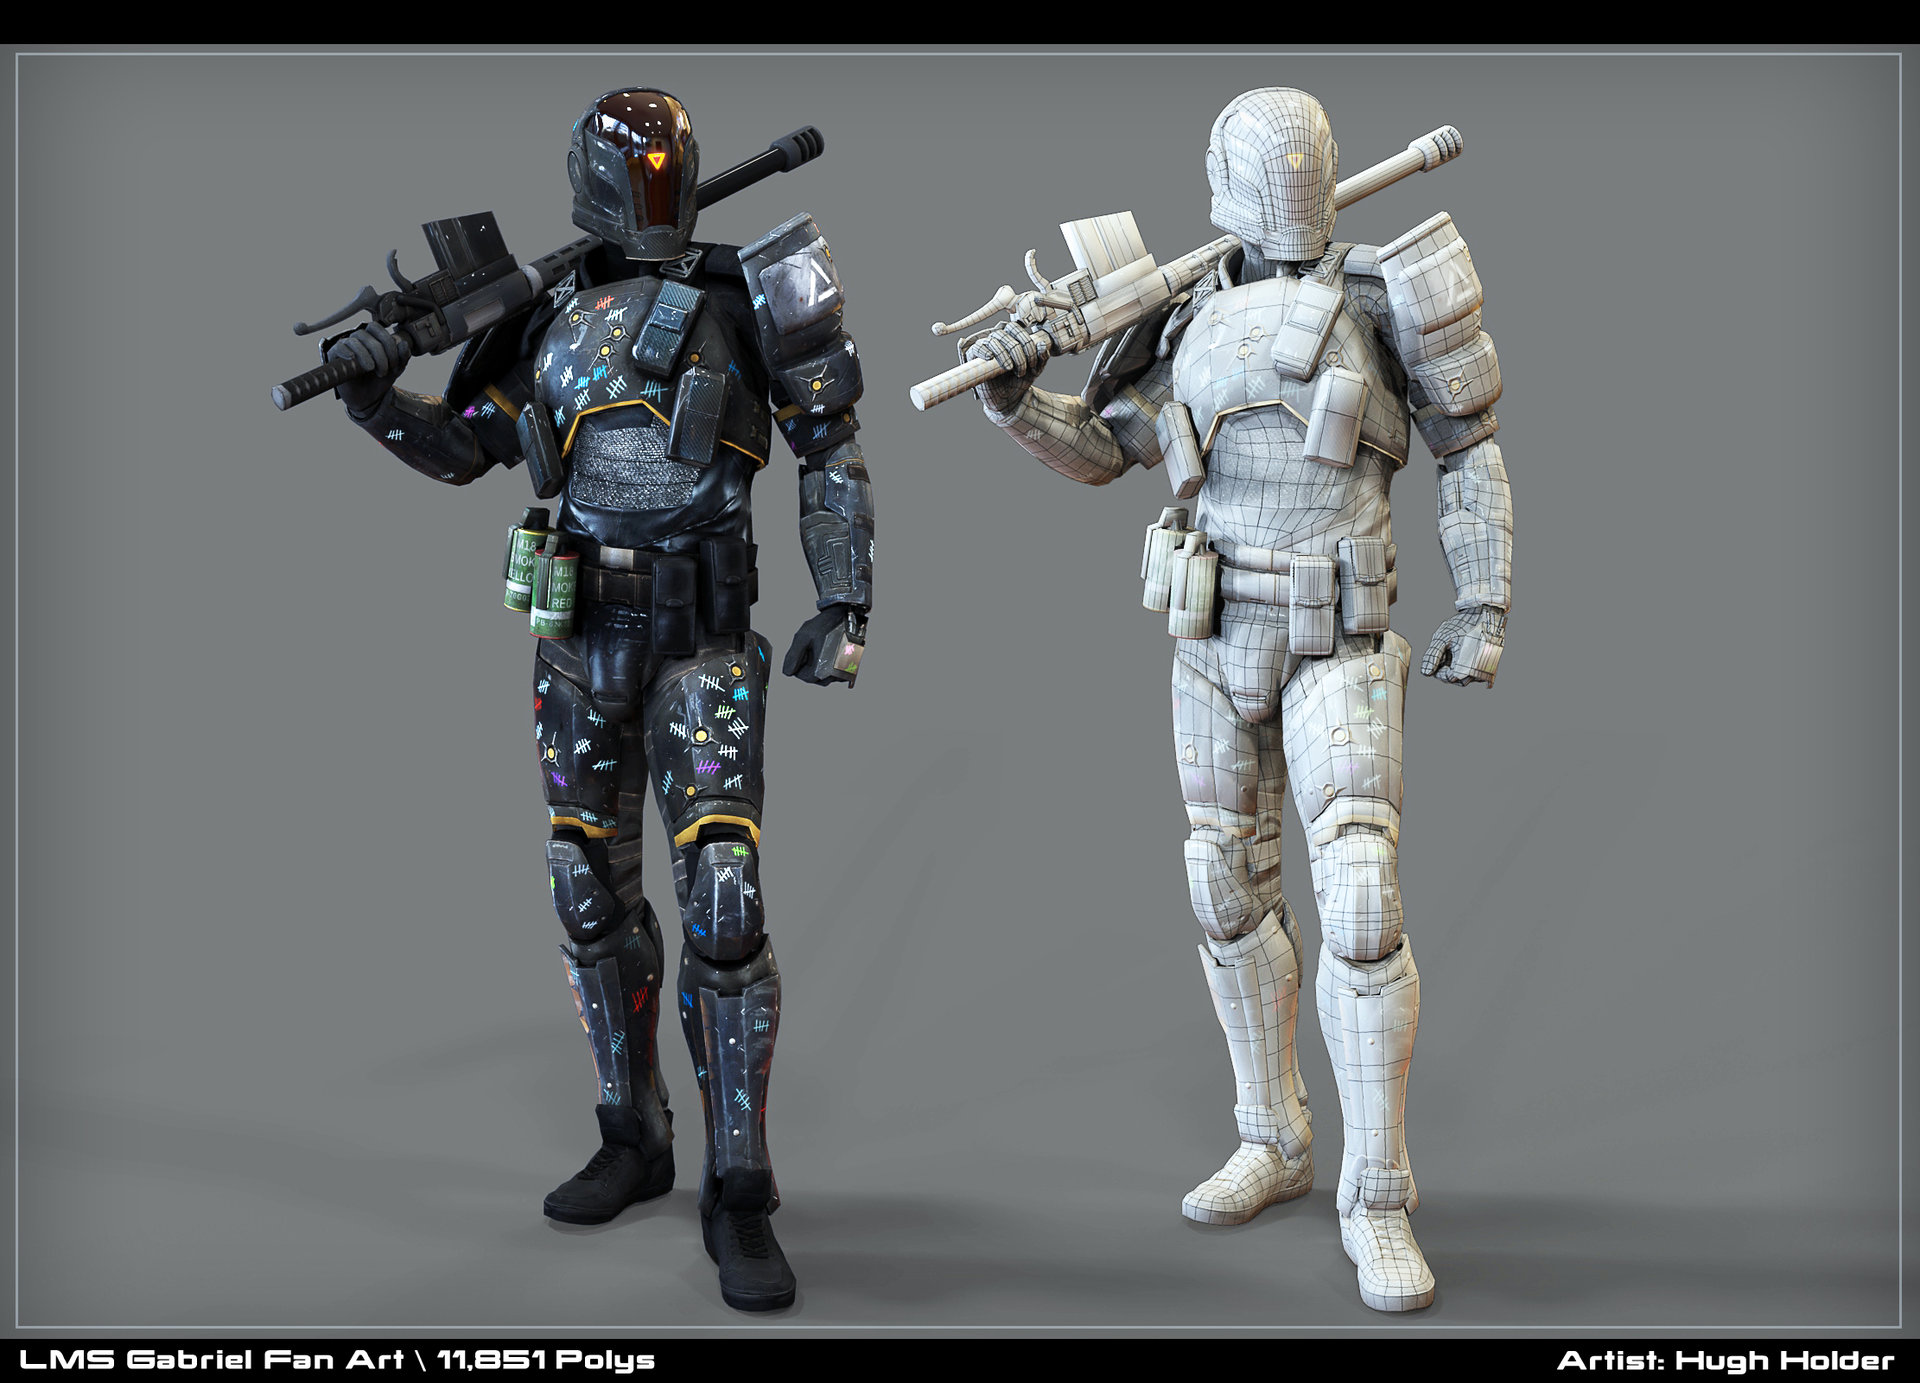
I wasn't sure how low I wanted to go with this asset poly-wise, since I wasn't sure what else to do with it except possibly print a mini bust. I settled for a little less that 12k. Time to find something else to make.